

(Source + Stabilization + Upscaling)
| * | Following the side-by-side comparison, I decided to create a standard video that combines everything—taking the best parts from each one—and includes stabilization and enhancements to produce the “perfect” video. |
| * | The final video appears here, and below is the full story and background that led to its creation on November 10th and its upload shortly thereafter, on November 11th—finally available on YouTube (See ahead under “The job is done”) with a new, “more perfect” version that has also been uploaded (See above—this serves as the main “featured” video). |
Background
I am writing this now (November 6, 2026):
Many years ago, I participated and completed in a fairly good result a half marathon running in the event of 2017 in Tel Aviv—and I used two kind of cameras. One was mounted on my chest, a good camera, sort of, and the other one, a very poor one, mounted on my forehead. Like I said poorly, I later realized that this video created by this poorly camera had many problems such as weird FPS and bad audio sync and quality, and I could not understand and found a solution how to be able to put those videos side by side with a perfect sync because of it. I remember having a general idea of how to implement this (at least theoretically), but I had no clue how to actually do it—at least not to a good or satisfactory result.
Now it’s November 6, 2026, many years later, and I was able to locate those videos in some distant backup (See: ‘Update (Oct.18.2026) – Survived‘)—and I’ve started to work on it and understand how to do this, withing a day or 2, I realized I will probably going to succeed. As such, finally, after so many years I will be able to upload this video in the best possible and it “will be out there”.
This is the only half-marathon event that I ever participated in, and the second half-marathon ever. It was important to me because it’s a nice memory to share this entire event from a first-person angle.
So, in the photos (ahead) are the project that I tried many years ago, and now the files that I was able to locate inside this folder, ready to be used for the current process:
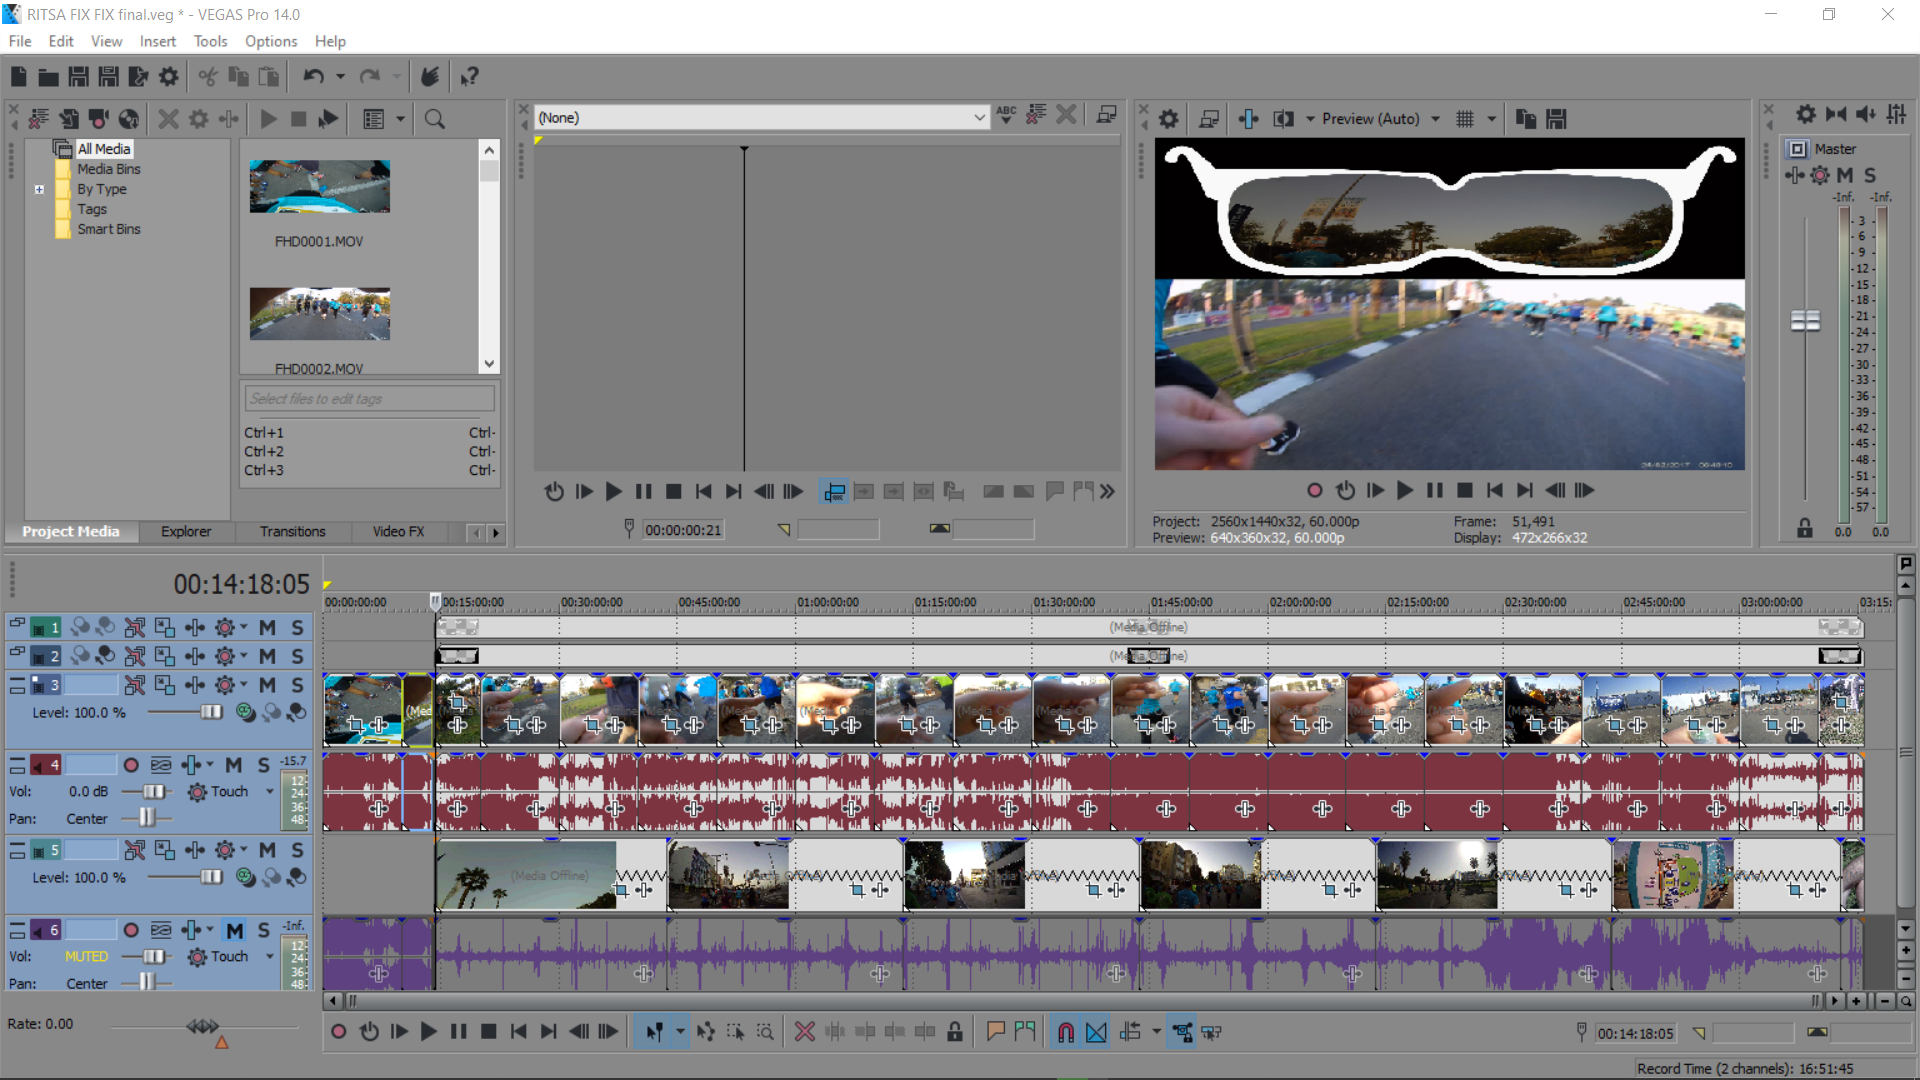
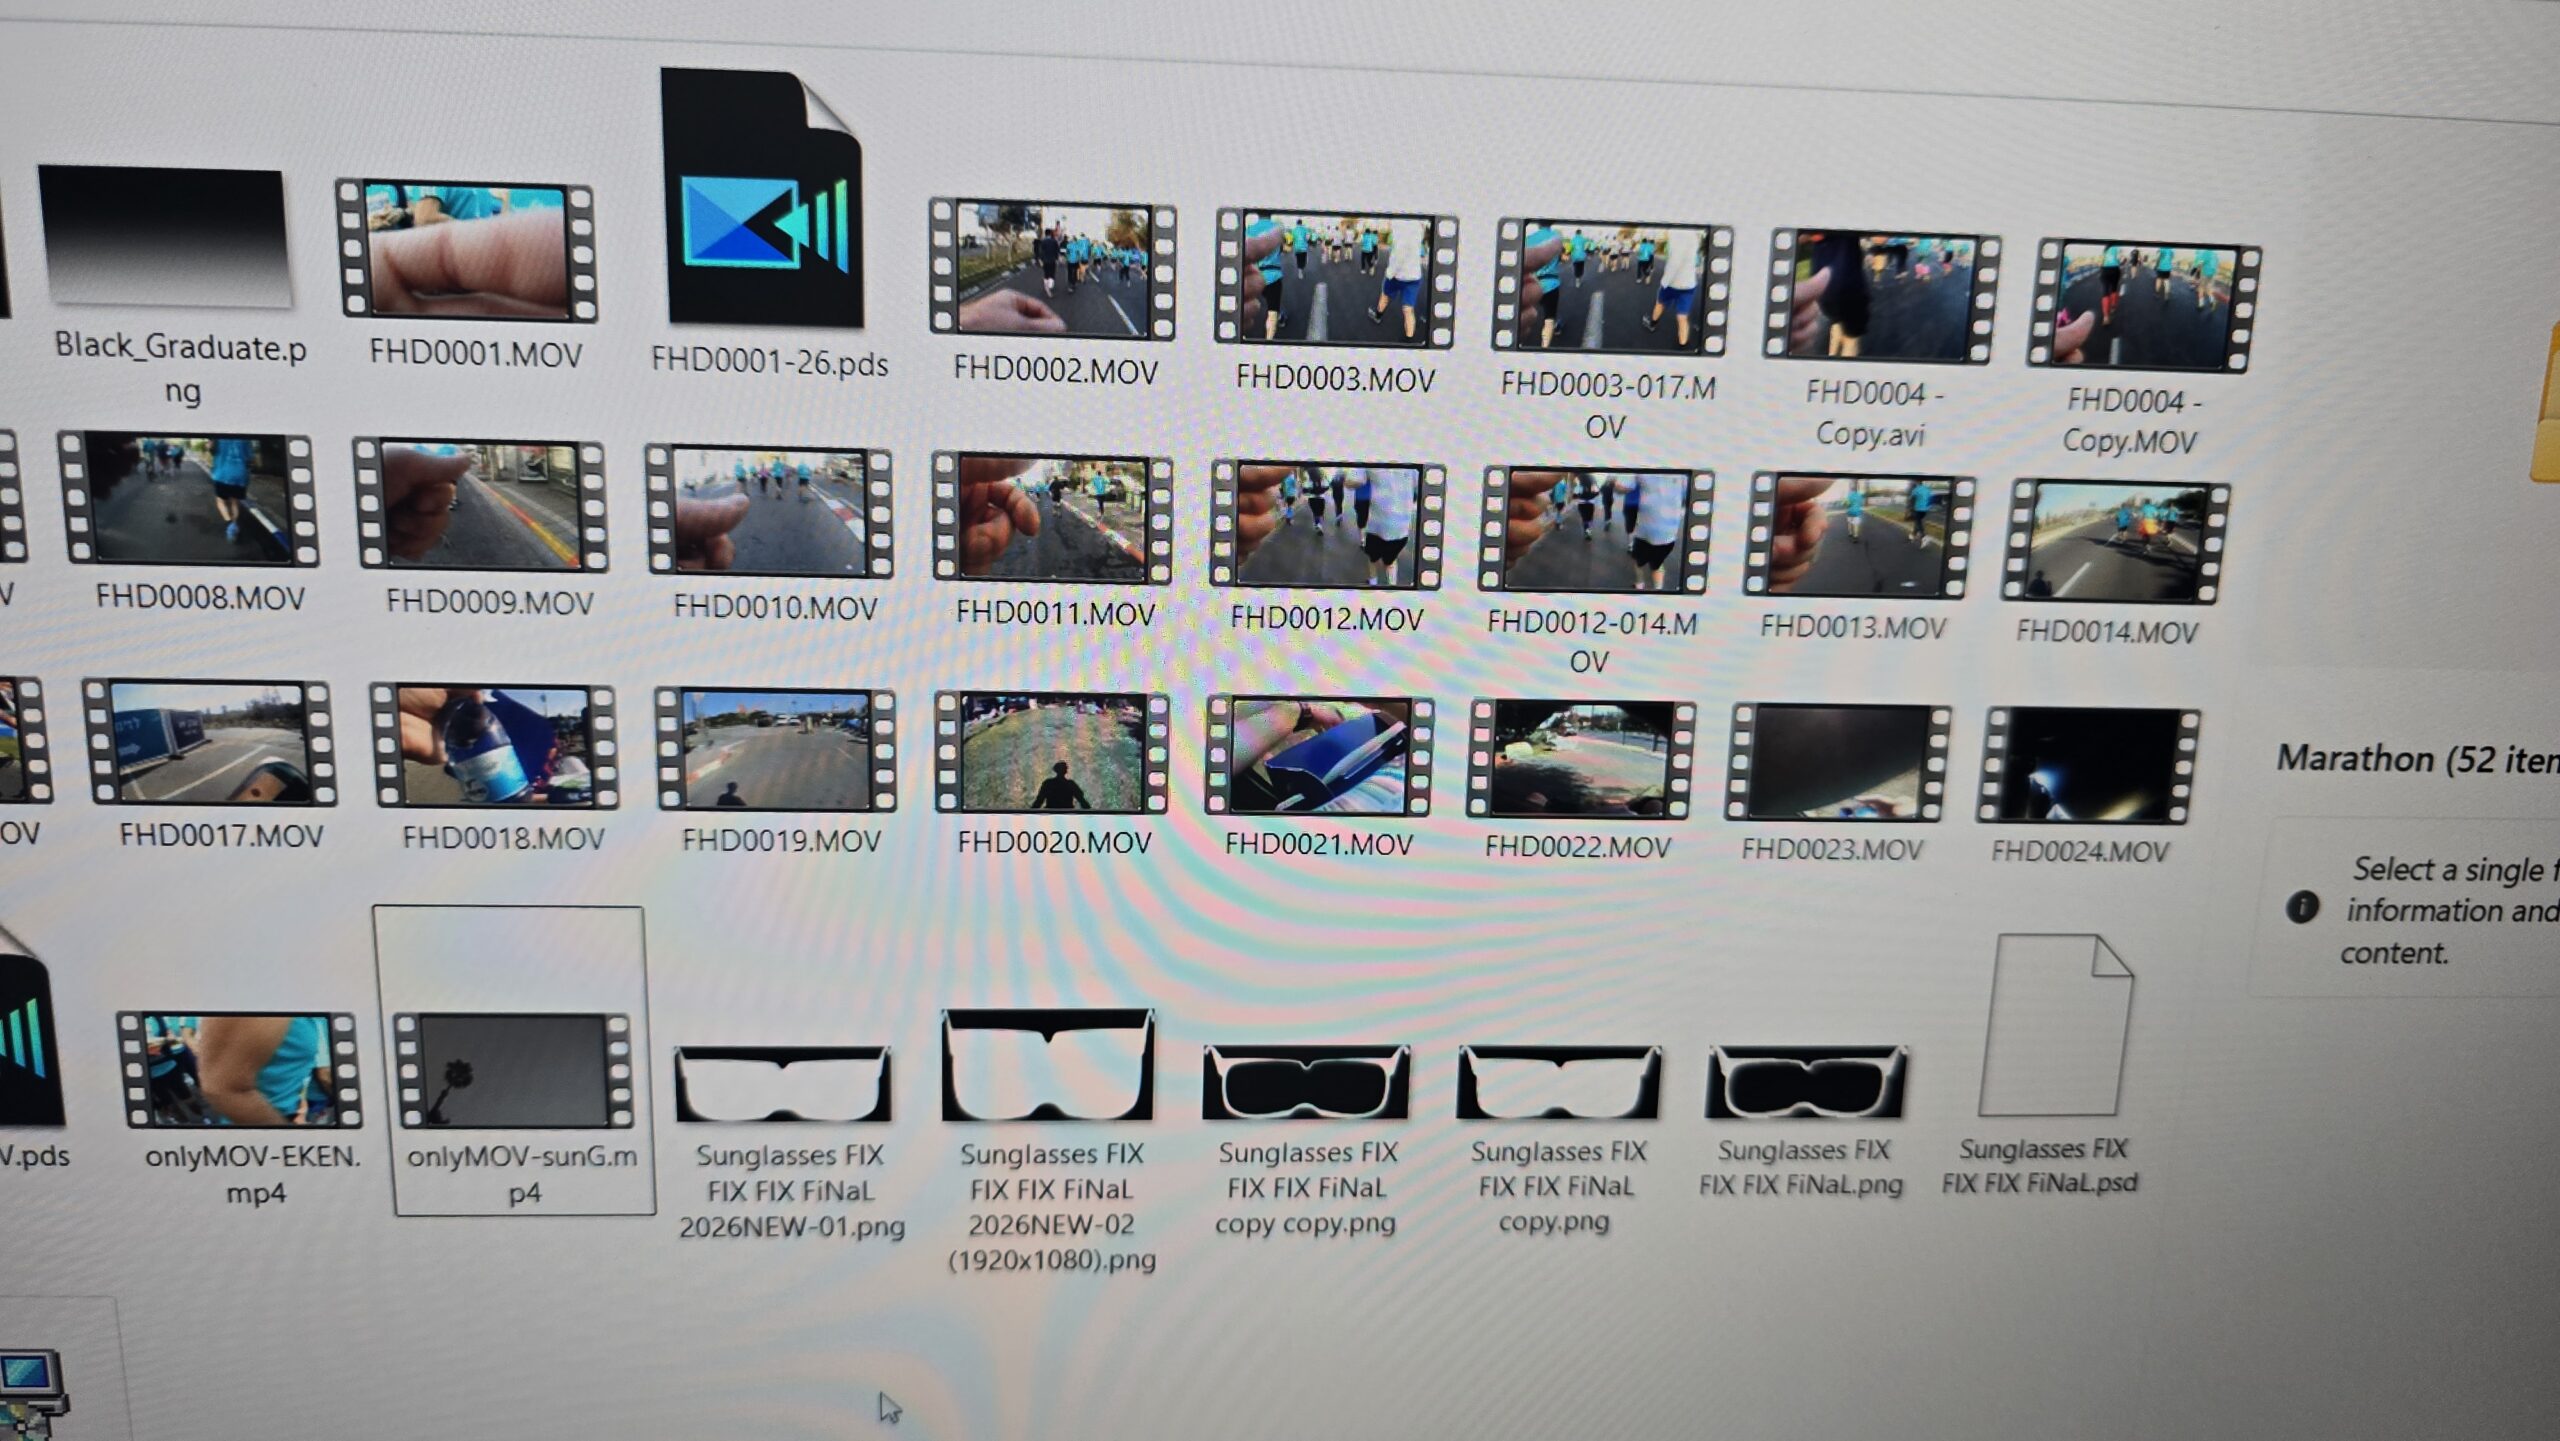
(Apr 10, 2017)
(Nov 6, 2026)
| * | Basically, it’s a folder containing the original Eken files (such as “FHD0001.MOV”—along with a merged file, “onlyMOV-EKEN.mp4,” which combines all the parts), various files required for the project, a folder containing files from the other camera (such as “PICT0001.AVI”—along with a merged file, “onlyMOV-sunG.mp4”), and more. |
In the video, I provide some background and, primarily, explain the general concept, the challenges involved, and how to solve them:
| * | I am writing this after the fact (it is now November 9th), now that I am able to provide a more precise explanation based on what actually transpired:
To clarify, let’s look at an example I encountered. Suppose I take a 5-minute video segment and identify two reference points—for instance, 00:00:05.15 (5 seconds and 15 frames) and 00:05:00.00 (exactly at the 5-minute mark). If I compare this to a “correct” version of the video, I might find that the synchronization points differ by a 30-second gap. If I align both videos at the 00:05:00.00 mark, the starting point will naturally be out of sync. If I then shift the starting point by those 30 seconds (by adjusting the playback speed—either speeding it up or slowing it down), one would expect the starting point to align perfectly across both videos. However, in practice, this didn’t work; I had to keep adjusting the timing—shifting it by more or less than 30 seconds—until I finally found the perfect alignment (for example, the video segment ultimately required an adjustment of 25 or 35 seconds, rather than exactly 30). It is worth noting that as soon as I performed the initial 30-second synchronization, the optimal sync point (the “2nd” = “5-minute mark”) shifted. Consequently, I had to drag the entire segment back to its correct position and recalculate the remaining offset—which was smaller, yet still present—based on the new starting sync point. I repeated this process until I arrived at a specific value—for example, “an adjustment of 25 or 35 seconds”—at which both sync points became quite accurate (and, at times, even perfect). In this way, I managed to achieve excellent synchronization at these two specific points, despite the video having been in a terrible state to begin with. However, within the segment between these two points, there remains a slight synchronization discrepancy—roughly 0–2 seconds—though this is a significant improvement over the initial state, which was an absolute disaster. |
Update (Nov 7, 11:35 AM)
I have one final part (out of 5) remaining from the poor-quality video that I need to work on, in order to synchronize it with the good-quality video (Eken). This serves as an example of the issue, demonstrating that there is a reliable reference point to work from—with the unsynchronized version on the left and the corrected (synchronized) version on the right. Specifically, in this instance, the video speed adjustment required—meaning the extent to which the video needs to be stretched or compressed—is 1.06x.
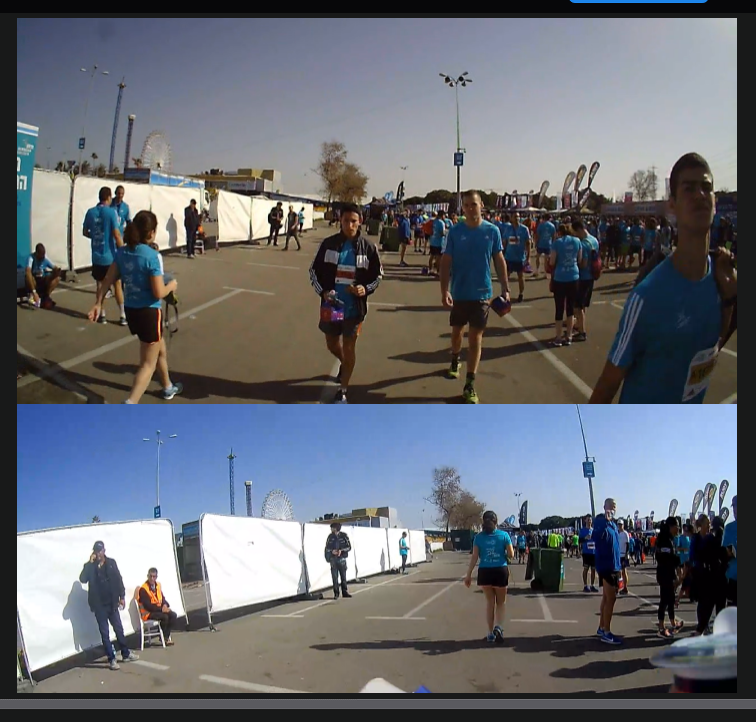
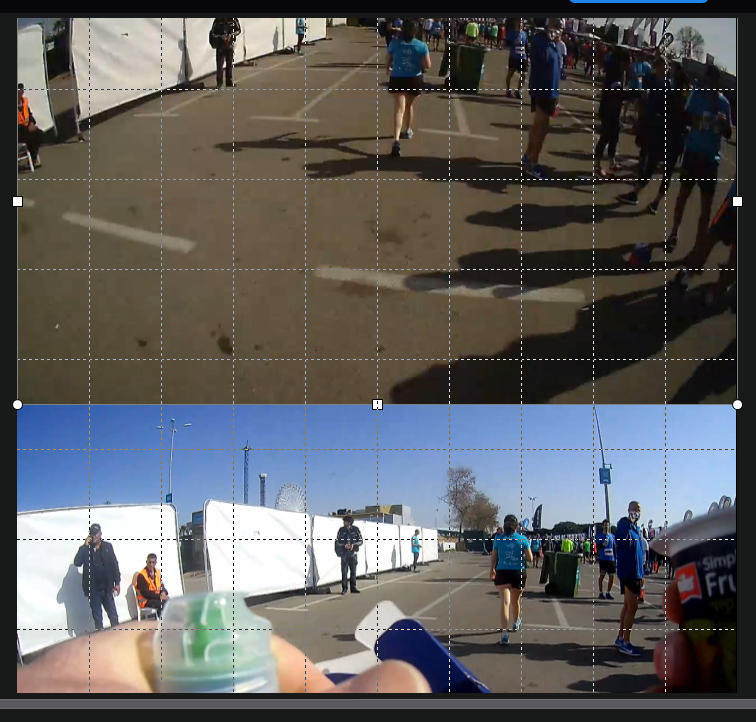
| * | Aside from 2 highly problematic tiny segments (one very problematic of a 1 second, following with additional 2 seconds), almost everything is semi-perfectly synchronized using a factor between 0.95x and 1.05x (occasionally, about 0.80x and 1.10x). To clarify: I identified two reference points that are perfectly synchronized; however, the segment between them behaves as if, upon moving past the first point, the synchronization progressively drifts further off until the midpoint, after which it gradually realigns until reaching the second point. Consequently, in the worst-case scenario, I probably encountered a deviation of up to 3 seconds, though it typically fluctuates between 0 and 2 seconds (it is unclear whether this is a lead or a lag). |
| * | In any case, it’s a huge improvement over a video that plays side by side in a highly erratic behavior, compared to what it is now—it’s not bad at all. |
Update (Nov 9, 17:10)
The day before yesterday, I started encoding the video using my editing software and left it running overnight (let’s say for about 10 hours). By morning, it had only reached 20% completion. I also needed to use the computer for other tasks—like browsing the internet—which shouldn’t have required much processing power, yet the software crashed after about two hours. As a workaround, I decided to split the full video (which is approximately 4 hours and 15 minutes long) into three segments (two 1.5-hour parts and the remainder). I tried encoding again overnight; after 10–12 hours, the process finished, but I still had the other two parts left to encode. The encoding took so long likely because, in addition to using a mask, I was also attempting to adjust the exposure, lightness, and HDR settings. This means I’ll now have to wait another two nights for the remaining two segments to finish processing
Ultimately, the next day (November 9th), I decided to abandon those adjustments and leave the video in its original state—using only the necessary mask. I applied this to the entire file and made sure not to touch the computer at all. The process finished in 7 hours, 21 minutes, and 22 seconds—much faster! Unfortunately, I forgot to disable the audio track from the “bad” camera source in the editing software, failing to keep only the clean audio with a perfect sync, from the “good” camera source.
Consequently, I still need to swap the audio and correct the video resolution—the editing software has rigid settings, so I was forced to select 2160×2700—followed by a crop to remove the remaining black borders. The file I am currently working with has a size of 71.5 GB. In short: I need to replace the audio, correct the resolution, and crop the video.
Ultimately, following this entire process, the final resolution (as it was intended to be from the start) is: 1920×2160.
Update (Nov 10, 15:00)
I attempted to encode the same video—using the required resolution and cropping—with two different software programs (running roughly simultaneously on two separate computers). The process took about 16–17 hours. One program failed in a bizarre way and completely ruined the output (see the second image), while the other worked well (see the third image). The first image shows the source material—specifically at the timestamp 01:22:05.000 (i.e., frame: 295501,60). My Internet speed is not super fast and it might take anywhere between 10 and 25 hours, but that is the final step, which is uploading to YouTube.


After that, I plan to create a standard version (3840×2160) that combines all the clips into one seamless, continuous video. I will upscale the resolution from 720p and 1080p to 4K, and include stabilization to make it a much more impressive action video. However, it will take me a while to figure out the most precise way to do this. Even once I have a solution, the processing alone could take days, so the final version will likely take many more weeks. In the meantime, the current side-by-side version is already great.
The job is done:
| * | This is almost exactly what I had in mind back in 2017 when I first wanted to edit this video, with two minor differences: I adjusted the glasses to cover a larger area, thereby providing a wider field of view for what appears inside the lenses. Specifically, I slightly altered the arms (essentially shortening them) and widened the frames so that the “lenses” would end up being larger. Furthermore, while the area surrounding the lenses was originally intended to be solid black, I decided to set it to 50% opacity; this allows that surrounding area to remain visible (I didn’t want to eliminate it completely) while still achieving the effect I wanted—a “run through the glasses.” |
Update (Nov 11)
| * | I woke up at 7:30 this morning to find that the video was finally up—so that’s it; now everyone can watch it! |
Video stabilization always involves cropping, which results in the loss of information from the edges. (While AI might allow for minimal—or even zero—cropping, and potentially achieve “perfect” stabilization, some degree of cropping will likely always be necessary.) In any case, here are examples of the cropping I performed: on the left is the original footage (specifically, the synchronized 720p version—referred to here as “the original”). Next is an attempt at stabilization that looks good but is cropped too heavily (approximately 40% crop – Top Crop: ~150 pixels cut {The entire head of the streetlamp is gone}, Bottom Crop: ~150 pixels cut, Left Crop: ~260 pixels cut, and Right Crop: ~260 pixels cut = Overall Zoom: ~1.43x zoom (a 43% magnification) and Active Area: 896×504 pixels). Moreover, there is another attempt, aimed at maintaining maximum stability while minimizing the loss of information (approximately 10% crop – Top Crop: ~35 pixels cut, Bottom Crop: ~35 pixels cut, Left Crop: ~60 pixels cut, and Right Crop: ~60 pixels cut = Overall Zoom: ~1.10x zoom (a 10% magnification) and Active Area: 1160×650 pixels). Finally, a 0% crop (no cropping) version—because the software reconstructs the empty borders, it visually expands the surroundings, making the footage feel as though it was zoomed out by ~10% (Uncropped by ~10% / “De-magnified” by ~0.90x zoom)
Ultimately, I will need to select the optimal balance between stabilization and cropping. Afterward, I will either upscale the 720p footage to 1080p, or perhaps upscale both versions—the 1080p to 4K (a 4x increase) and the 720p to 4K (a 9x increase). I haven’t yet decided whether I want the final output to be 1080p or 4K.
The example below visually illustrates what happens during the stabilization process, showing: the original, stabilization while retaining 100% of the video (i.e., 0% cropping), 10% cropping, and 40% cropping:
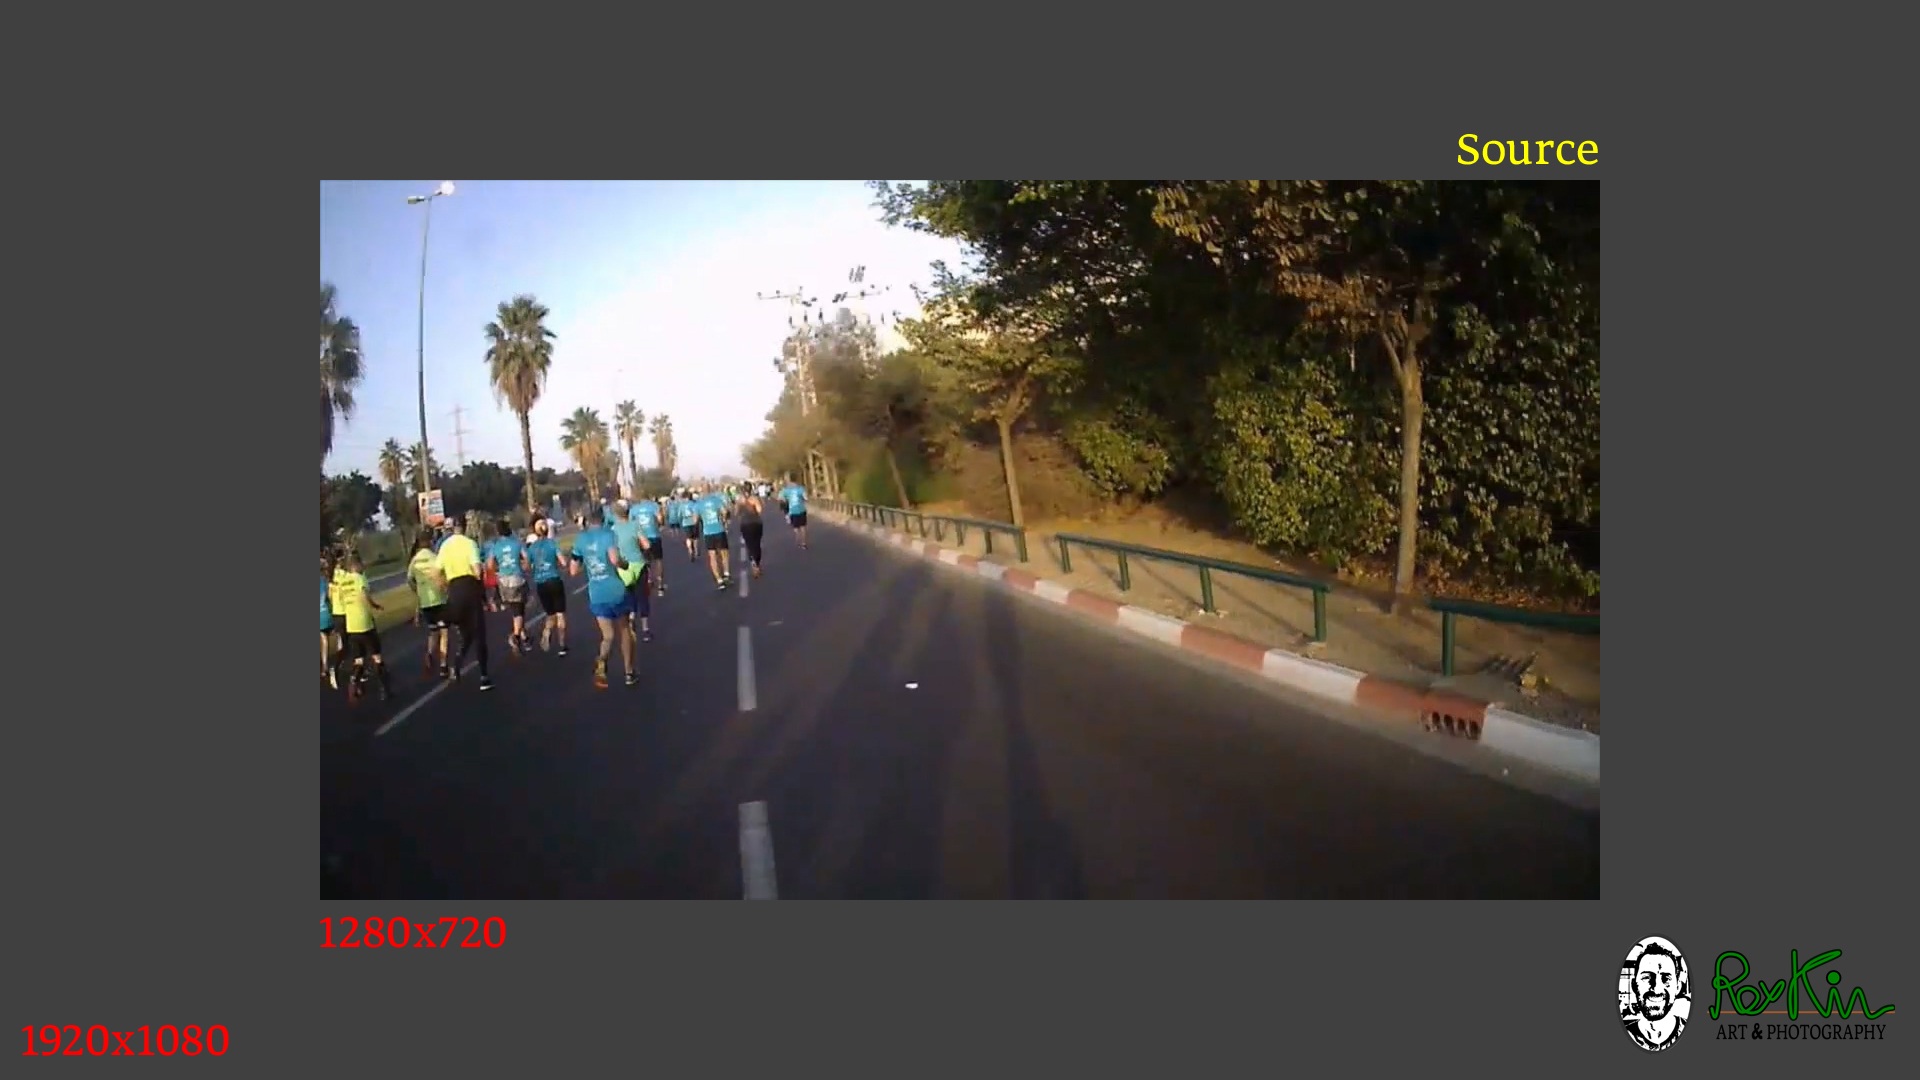
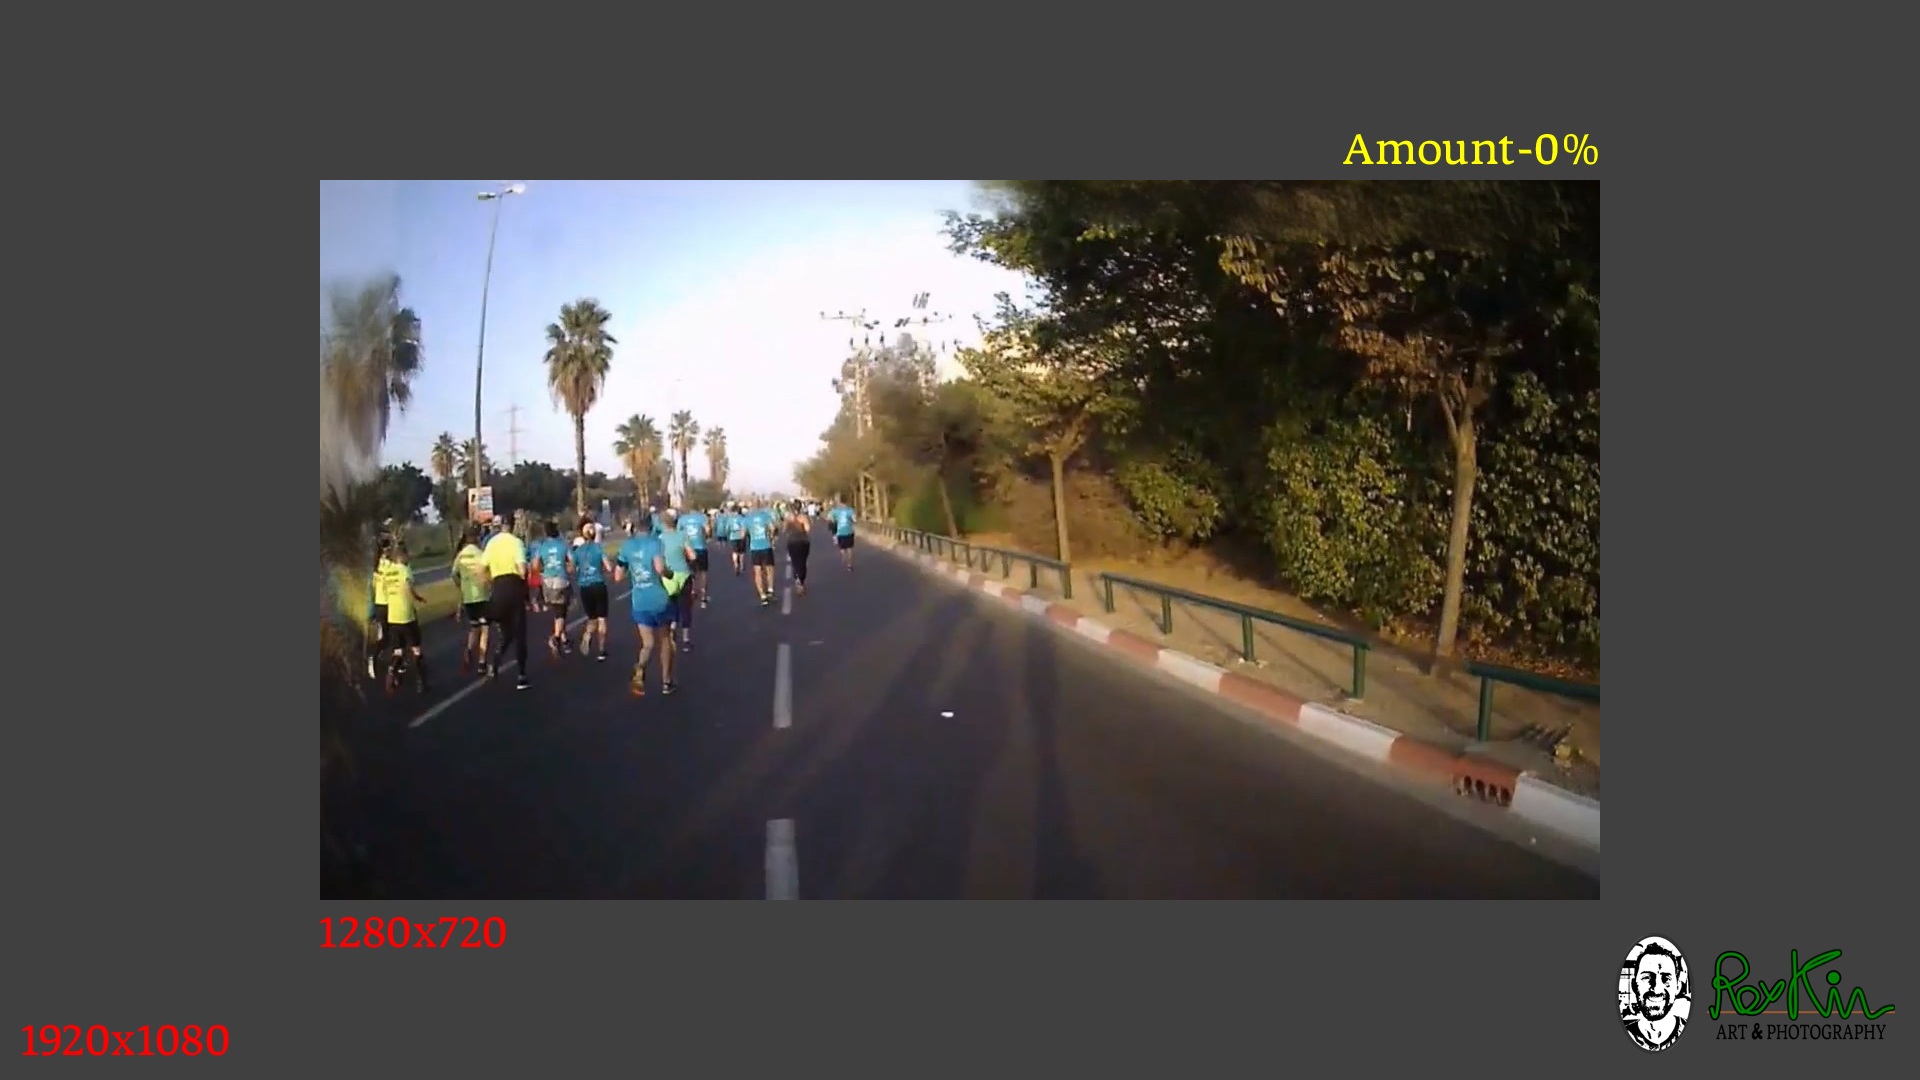
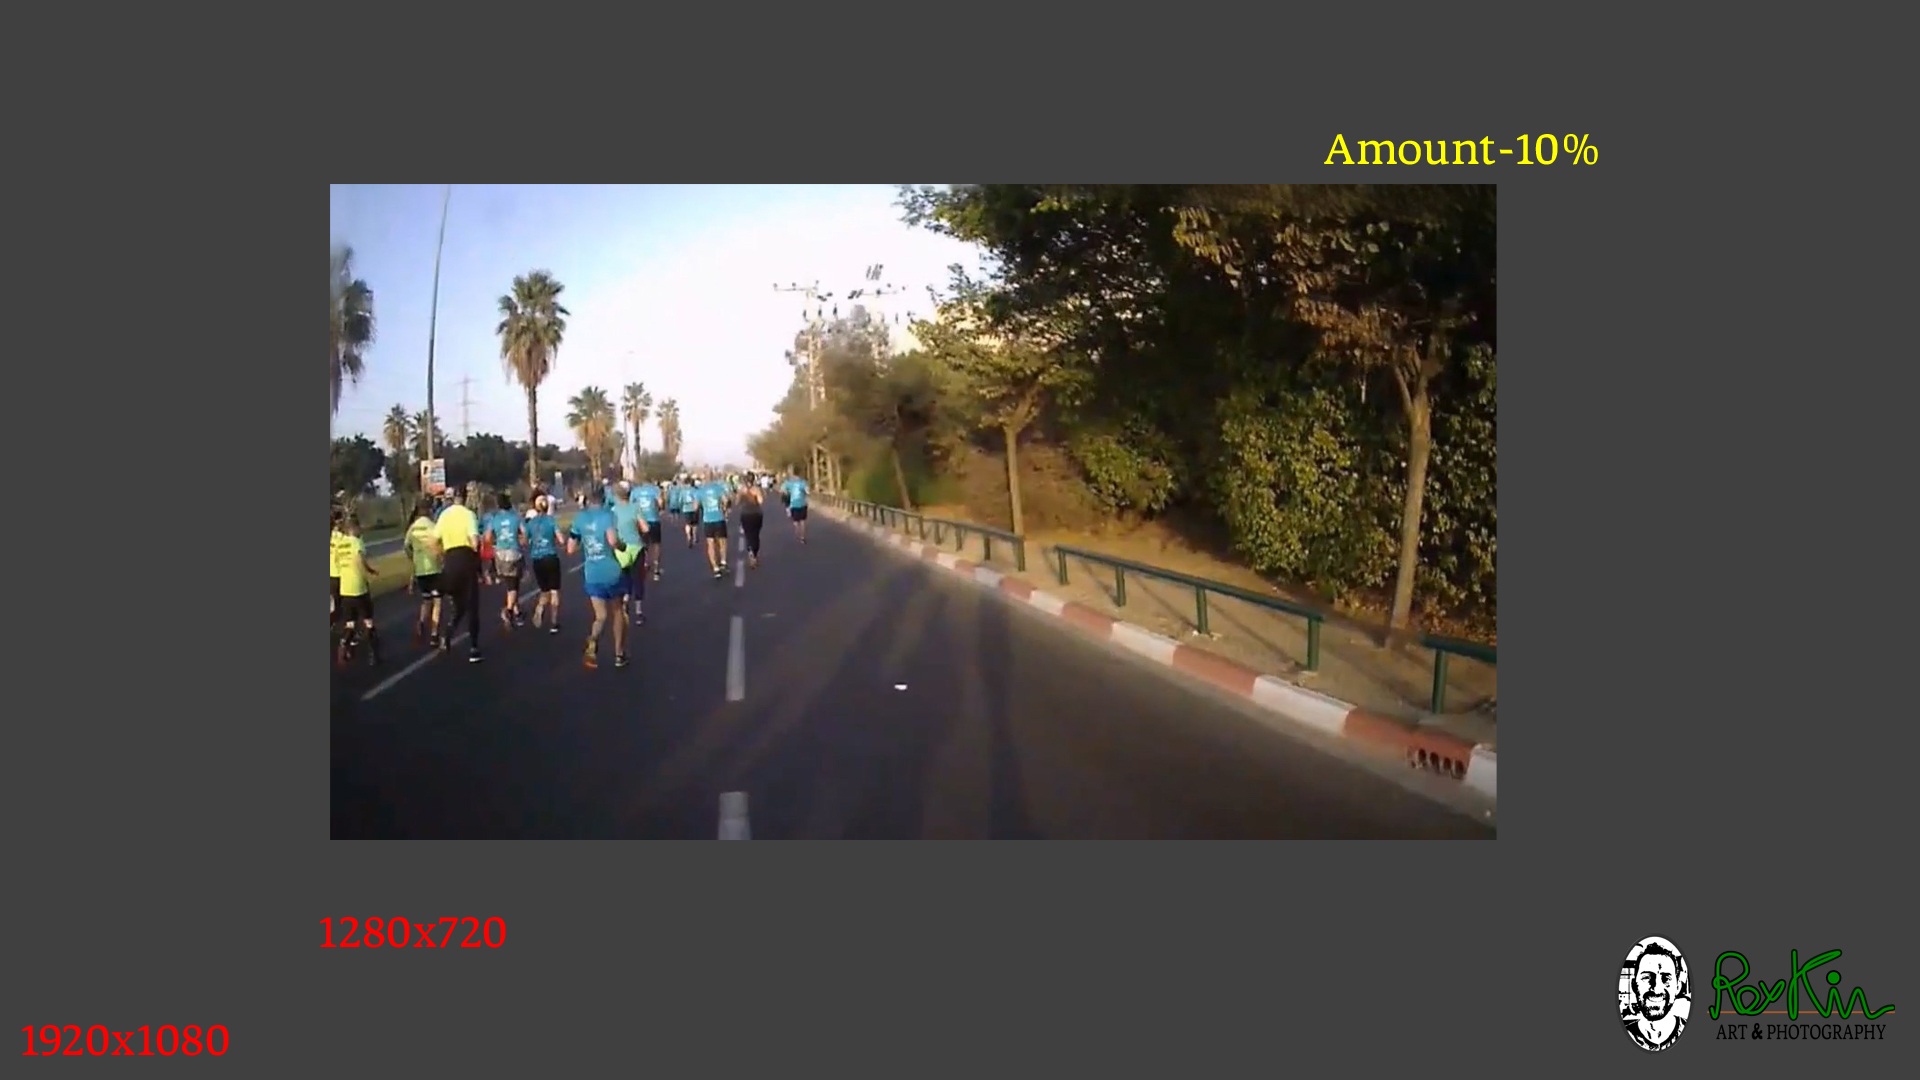
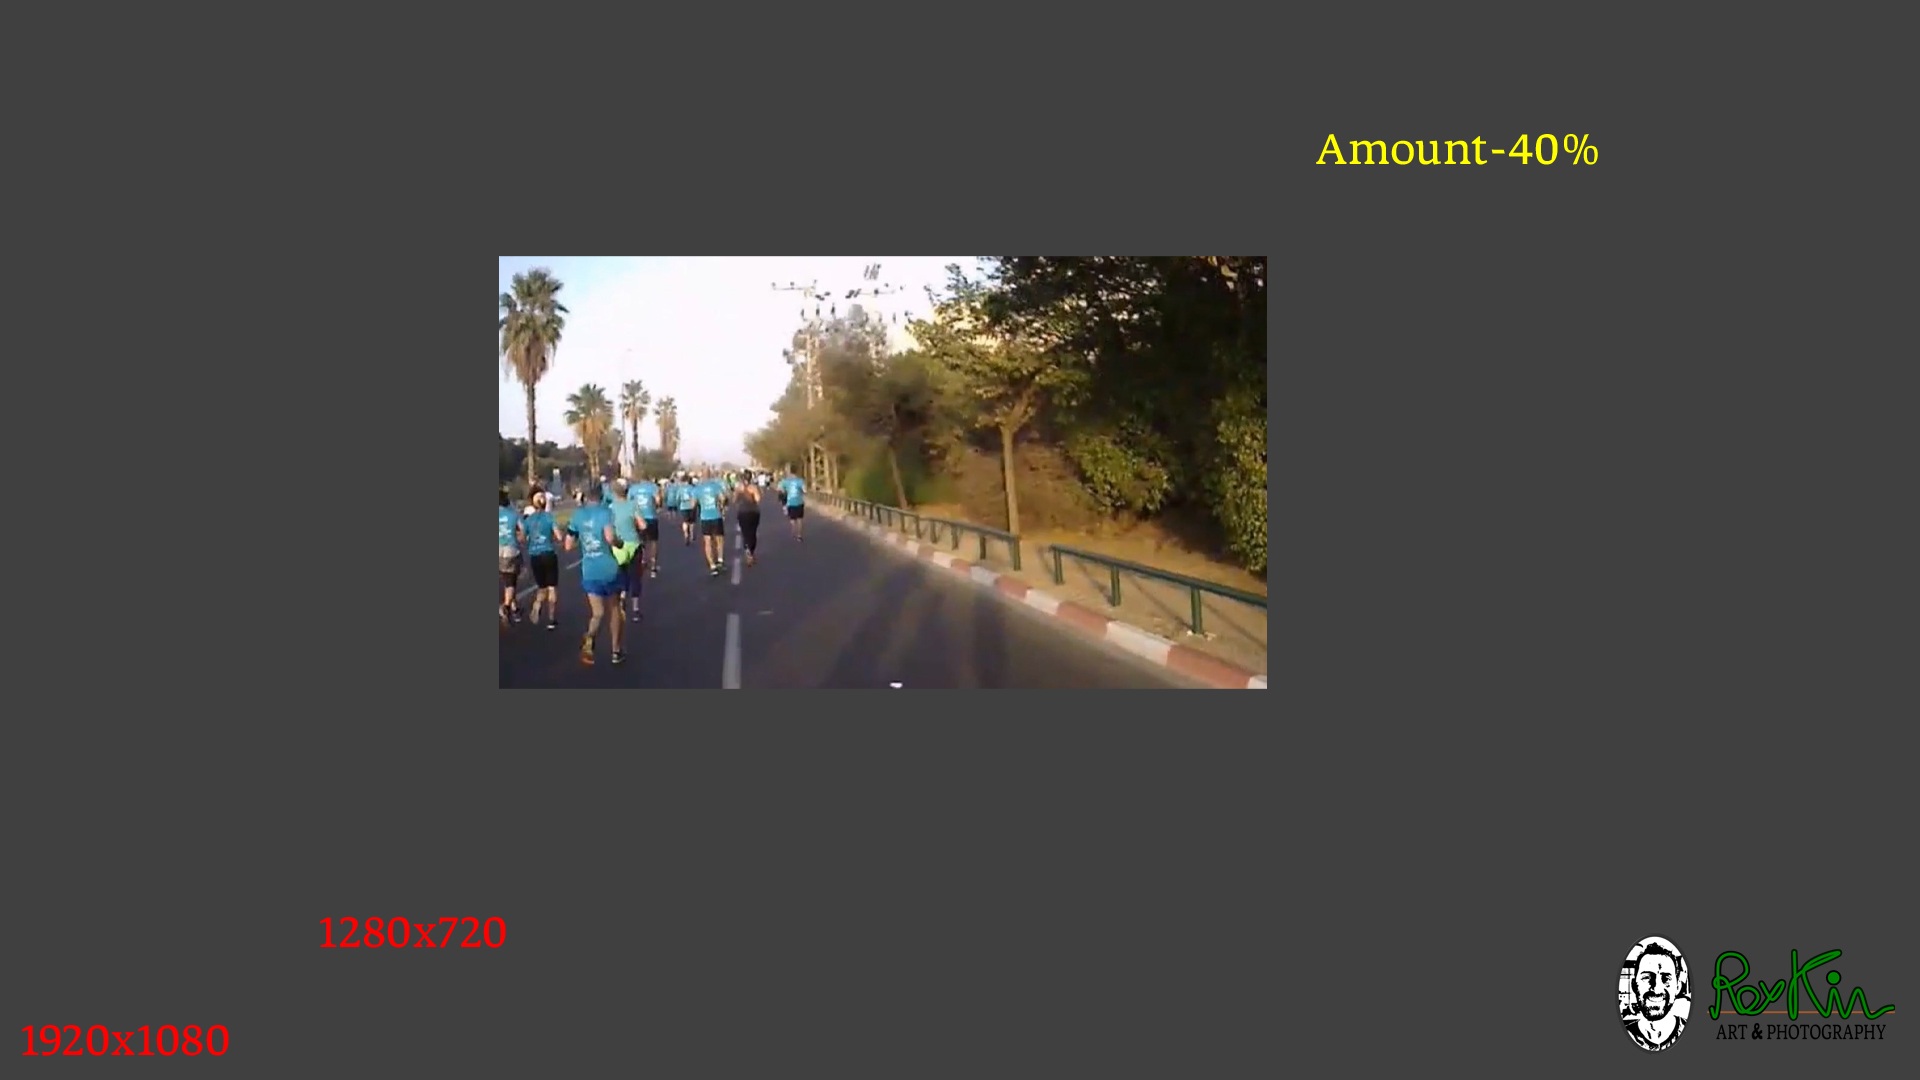
Another example, taken from a different point in the video, illustrates the same principle while providing further insight into details that were less apparent in the example above:
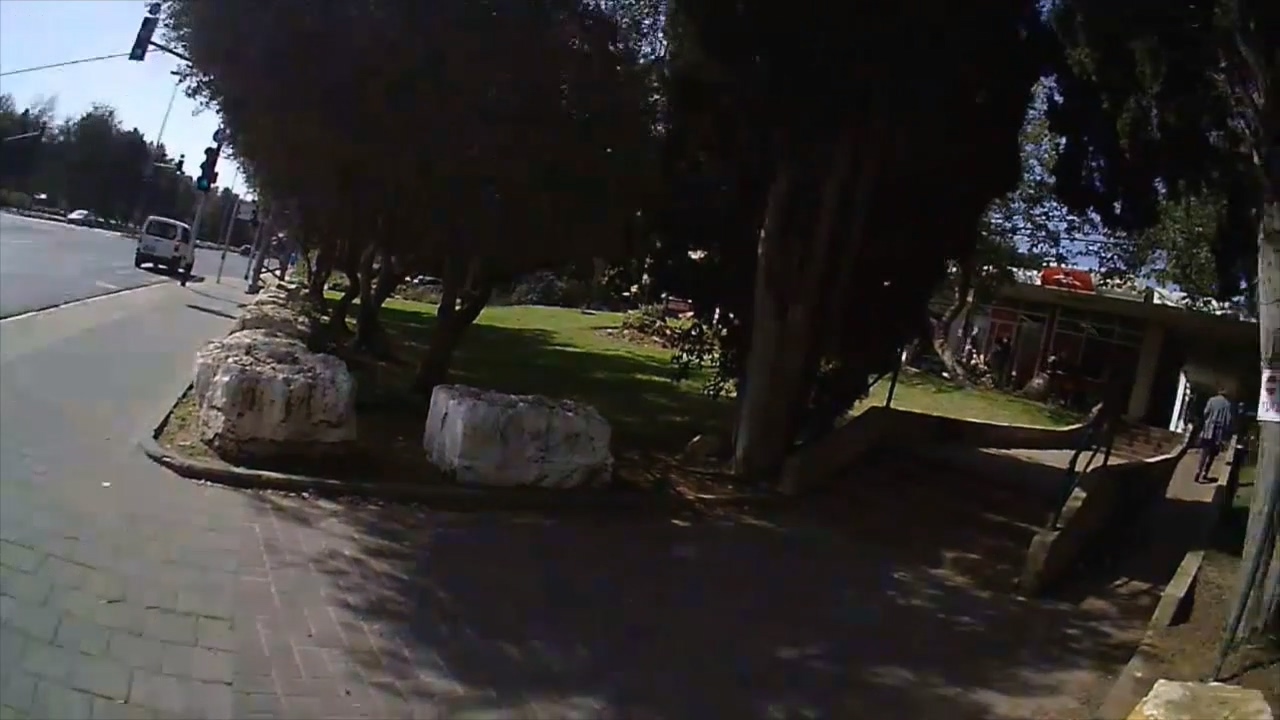
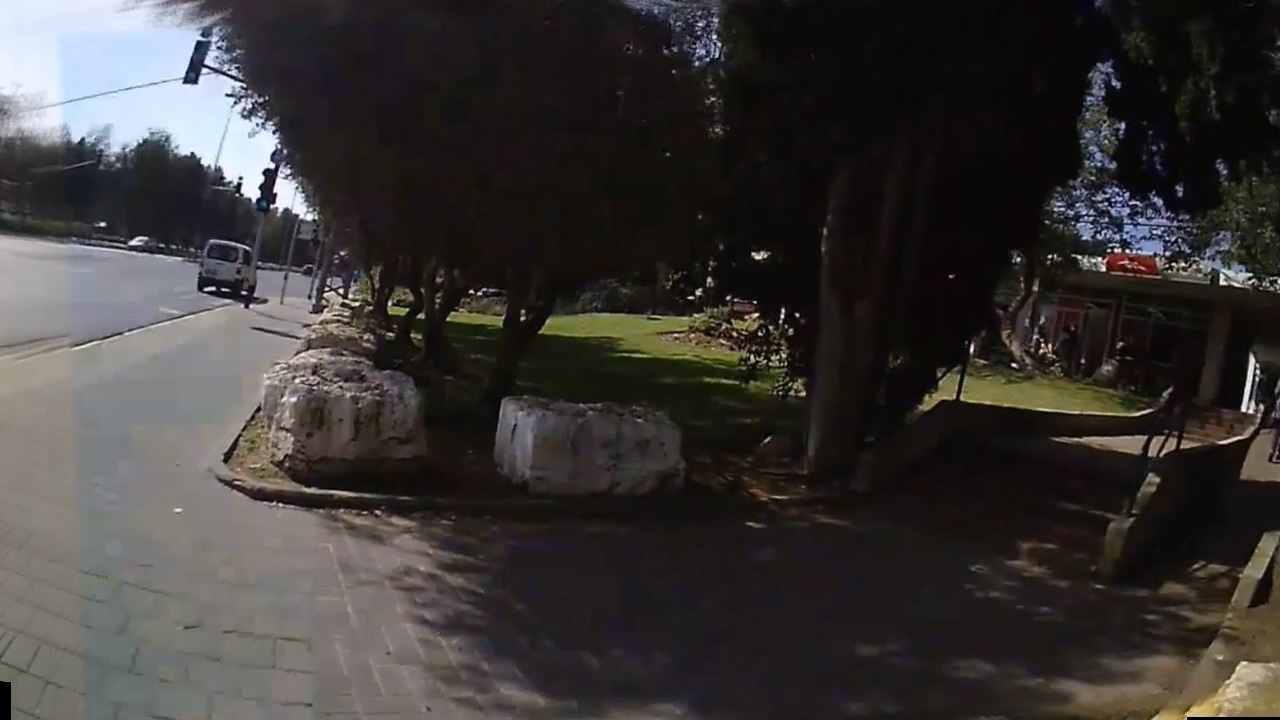
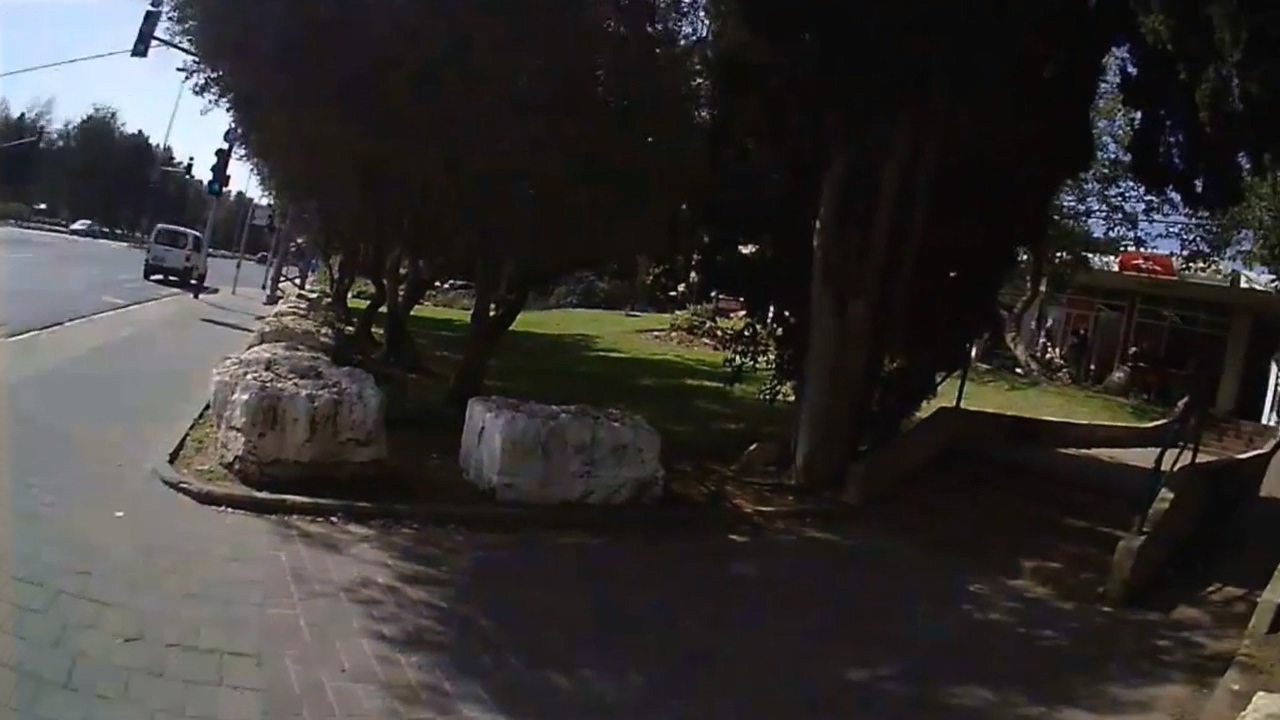
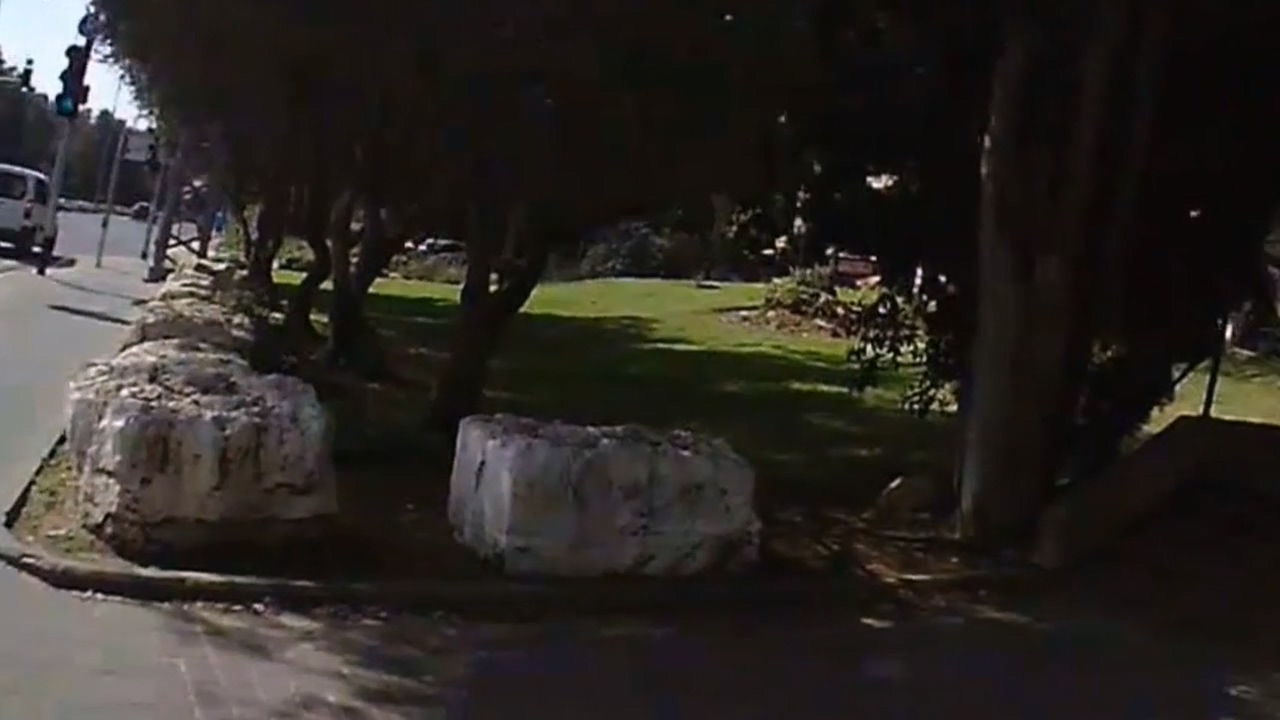
| * | It should be noted that, compared to the original footage, the cropped versions differ in orientation—the video has been rotated by approximately 3.65 degrees (clockwise or counter-clockwise, depending on your perspective). Consequently, the cropped versions appear more “level” or “aligned”. |
Update (Nov 12)
| * | It looks like I’ll end up choosing the version with a 10% crop. |
Additionally, today I’m dedicating time to footage outside of that specific video segment (see the “Sunglasses”)—specifically about 25 minutes from the beginning and 35 minutes from the end, which were shot using the Eken camera. Thus, I’ll combine everything into a continuous video of about 25 minutes of Eken, 3:15 hours of “sunglasses” and 35 minutes of Eken – the best of all, that is, a much better point of view and more suitable for shooting action through sunglasses and having no choice but to use the outer parts that I only have them from Eken.
After applying very specific software settings for maximum stabilization and minimal cropping—moving beyond the “automatic” settings initially recommended—I found a configuration that worked perfectly for this section. However, these same settings don’t work well for the Eken segments, so I’ll need to keep experimenting until I can get that footage properly stabilized as well.
Update (Nov 13)
I have tried—and am still trying—to stabilize the first segment of the video (roughly the first 25 minutes, shot on the Eken). However, as can be seen in the side-by-side comparison—where the footage is unstabilized—there is a significant difference in the amount of camera shake (rotation, bounce or else) when comparing the “sunglasses” footage to the Eken footage. So far, I’ve tested 5–6 different software settings, aiming for optimal stabilization with minimal cropping, but I haven’t achieved a satisfactory improvement yet. I even tried a different software program that uses a simpler, non-mathematical approach to stabilization (though, theoretically, the mathematical method should be superior and the “correct” way to do it), but that didn’t help either.
While my latest attempt is an improvement over the first, I still have a long way to go before I find the “sweet spot”. On the other hand, the final segment from the Eken (about 35 minutes long) consists of walking footage; I don’t anticipate any issues there, and I believe stabilizing that part will be quite straightforward.
In any case, I am eagerly looking forward to successfully stabilizing the footage—and eventually upscaling it and more—to create the “perfect” video. I’m not sure yet if this will take days or even many weeks, but I’m confident it will all work out in the end.
Update (Nov 14)
I’m currently at a loss. I tried using “strict” settings—aiming for maximum stabilization with minimal data loss (i.e., minimal cropping)—but after many attempts, I’ve had no success. I also tried combining these strict settings with less strict ones (a compromising) to find an optimal balance, yet that didn’t work either. Furthermore, I tested again the less strict (basic) settings on their own—which is the recommended configuration—but while they should provide excellent stabilization, they result in significant cropping; in this case, too, the results were unsuccessful.
Throughout these attempts, the bulk of the 25-minute footage turned out fine—mostly consisting of walking or light running—but there are several minutes or specific segments that remain very “bouncy”, and I can’t figure out how to fix them. Even for the parts that turned out fine, I would prefer the quality to be even better.
In any case, I’ll keep working on it until I find a solution. After that, I’ll need to tackle the upscaling—which will likely require some research to figure out the best approach—all with the goal of achieving a normal-looking result before finally uploading it to YouTube.
A few hours later, I tried a different software and saw this result: there are many black borders, but the central area is actually relatively flat (horizontally) and stabilized. However, the questions are: how do I get rid of those black borders?, should I do a fill effect?, should I crop further more? and others configurations. Should I apply all?, is one better then the others?… the story continues…


| * | The first image is shown for illustrative purposes only, representing the state before any changes were applied (this is the initial frame). As the video progressed, the software attempted to compensate for various issues: sudden vertical jolts (“bumps”), sharp lateral movements, and a sense of “curvature” resulting from tilt—or, technically speaking, “rotation”. This is further complicated by the fact that the act of running is, by nature, a highly dynamic process. Following the first frame, two examples are shown demonstrating that the footage becomes significantly more stable and balanced across all parameters; however, this process creates black borders that require a “fill” effect or some other corrective solution. I will continue searching for the optimal solution(s) and get closer to the “sweet spot” as much as possible. |
Last update
????
(Nov 16, 10:00-10:41)
I should note that while you can certainly get a good idea of what’s possible here, these results are specific to my own action-running footage. Consequently, certain settings or parameters I chose—such as the 10% crop—might not necessarily be the right fit for your own videos or needs.
The Full Story
Samsung Tel Aviv Marathon 2017 Event
The Complete Technical Restoration Chronicle – 2017-2026 — ~10 Years in the Making:
1. The Beginning: Training, Race-Day Realities, and the Sportive Journey
Running a half-marathon in a live, first-person (POV) setting is an intense physical and mental challenge—an achievement I am deeply proud of, completing the entire distance with a strong result in the “Samsung 2017 Tel Aviv” event.
The Starting Line: Confusion and the Finish Time OffsetBecause of this slight starting delay, my actual running duration meant my personal finish time should have theoretically been around 02:14:34 (perhaps slightly less or more), though the official clock time remained the official result recorded for me (Summary – race: “Men’s General 21K”, time: 02:15:34, pace: 06:25 min/km, ranking: 1929/2698 in category and 4764/6669 overall). |
2. The Hardware Setup & The Pre-Race Recording Timeline
| From a hardware recording standpoint, the chest-mounted Eken camera (shooting at 1080p, 1920×1080 at 60fps) was activated right from the beginning and ran continuously throughout the entire ~4-hour duration of the event. Roughly 10–15 minutes after the Eken was mounted (and about 10–15 minutes before reaching the starting line), I put on the camera sunglasses. Due to early organization, they initially rested on my scalp and hair pointing upward toward the sky. It wasn’t until about 10 minutes later that I noticed this and lowered them onto my eyes so they pointed where I was looking. |
3. Phase 1: The Original Idea & The Side-by-Side Synchronization Project
| Years ago right after the event in 2017, I envisioned creating a synchronized side-by-side comparison, though at the time Vegas proved too complex and I lacked experience. This core idea was finally brought to life and implemented in 2026—you can watch the finished side-by-side video here: https://www.youtube.com/watch?v=3ukmX2QpsSg.
To make this side-by-side synchronization possible between the 1080p Eken video and the 720p sunglasses video, I had to combine external research with my own manual techniques:
|
4. Phase 2: Transitioning to the Final Continuous Restoration, Stabilization & 2K Upscaling
| Once the synchronization mechanics were figured out, the next major goal was completely different: to produce a single, continuous, standard video (not side-by-side). This meant stitching together the best parts of the 720p footage (the core 3 hours and 15 minutes) combined with the Eken footage that I had to rely on by necessity for the parts before and after.
To build this continuous master file spanning roughly 4 hours and upscaling it to 2K (2560×1440), the timeline was structured into major blocks:
|
5. Editing Parameters, Stabilization, Borders, and Workflow Exploration
To transform these disparate clips into a polished final video, I tested various stabilization and enhancement parameters:
Note: Everything outlined in the parameters above is theoretically sound and relevant, though in practice, results are heavily case-dependent and do not always work across every type of footage. |
6. Managing the Monster Folder, Renders, and the November 2026 Crash
Managing the project meant dealing with a staggering amount of data:
|
And so concludes the fascinating story of video enhancement. To return, scroll back or click on ‘Upward‘ to view the final video at the beginning.